
Zine Making From Scratch
Turn one sheet of paper into an 8-page magazine without a stapler.
About This Quest
Learn to fold, cut, and publish your own one-page zine in under 90 minutes using the classic 8-fold method.
Zines are the original self-publishing format—raw, unfiltered, and completely yours. The beauty of a one-page zine is that it requires almost nothing: one sheet of standard printer paper, scissors, and something to write with. Fold it the right way and you've got 8 panels to fill however you want. No editorial board, no algorithm deciding what people see. The 8-fold technique dates back to punk zine culture in the 70s, but it works for anything—poetry, comics, photography collages, rant manifestos, recipe collections, neighborhood field guides. You'll spend the first 20 minutes figuring out the fold pattern (it's counterintuitive until it clicks), then the rest filling your panels. The constraints actually help: knowing you have exactly 8 small spaces forces you to edit ruthlessly and think visually. Once your master copy is done, hit a copy shop or library printer and run off 20-50 copies for under $5. Leave them in coffee shops, trade with other zine makers, or hand them to strangers. There's something satisfying about holding a physical object you made from scratch that morning, watching someone actually read the thing while waiting for their latte.
Why This Quest Matters
You'll hold a physical object you made from scratch that morning, watching strangers actually read your unfiltered work while waiting for their latte. No editorial board approved it, no algorithm boosted it—just your ideas moving directly from your hands into the world. There's a specific thrill in seeing someone pick up something you folded and photocopied yourself.
What You'll Experience
- The counterintuitive 8-fold booklet technique from punk zine culture
- How brutal constraints force sharper editing and visual thinking
- Working within 8 small panels to create a complete narrative or collection
- Low-cost photocopying and physical distribution strategies
- Publishing without gatekeepers or digital platforms
What You'll Need
Top gear to make this quest great.
Pull it off
Pigma Micron Pen Set
These pens photocopy perfectly without smudging or fading, and the archival ink won't bleed through thin paper. The variety of tip sizes lets you do fine detail work and bold titles on the same page.
Get on Amazon · $12.64 — Pigma Micron Pen Set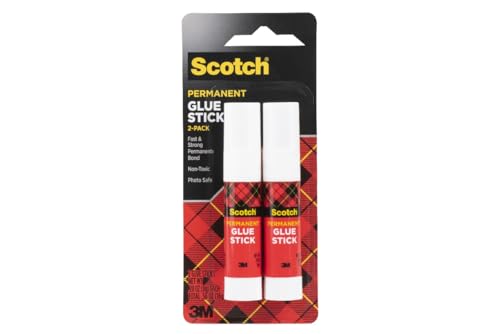
Liquid glue warps paper and takes forever to dry. Acid-free glue sticks let you attach photos, magazine cutouts, or printed elements without wrinkling. Dries instantly so you can keep working.
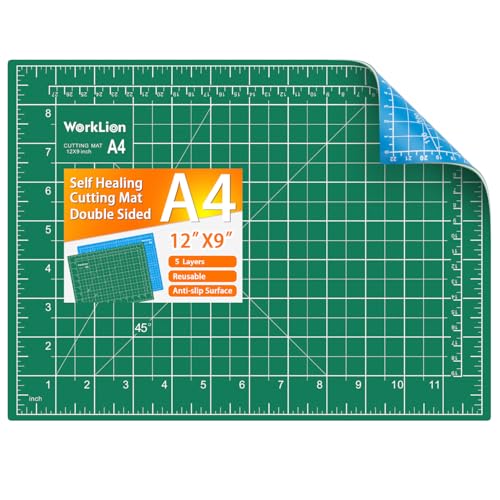
Kitchen scissors leave rough edges and can't do detail cuts. A craft knife gives you clean lines for windows, pop-ups, or precise collage trimming. The mat protects your table and extends blade life.
As an Amazon Associate I earn from qualifying purchases. Prices may change.
Step-by-Step Guide
Master the 8-fold technique
Fold a practice sheet in half lengthwise, then in half twice more the short way to create 8 panels. Make one vertical cut along the center fold line—only between the two middle panels. Refold lengthwise and push the ends toward center until the cut opens up and forms an 8-page booklet.
💡 Pro Tips:
- • Practice 2-3 times with scrap paper until the transformation becomes automatic
- • The page order when flat is counterintuitive—mark where pages 1-8 land on a test sheet before creating your real zine
Plan your 8-panel layout
Map out where your cover (page 1), content (pages 2-7), and back cover (page 8) will actually land when the paper is folded flat. Test with a dummy copy first—most people get the page sequence wrong initially.
Fill all 8 panels with content
Work directly on your good paper or create elements separately to glue in. Use black ink for best photocopying, and choose high-contrast images over subtle grays. Consider comic strips, photo series, neighborhood maps, recipe cards, short fiction, collage art, or interview transcripts.
💡 Pro Tips:
- • Complete all pages, even if the back is just your name and contact info—it feels more professional
Photocopy your master edition
Run off 20-50 copies at a copy shop or library printer for under $5 (8-12 cents per black and white copy). If using color, test one copy first since they cost 50-75 cents each and expenses add up fast.
Distribute in the wild
Leave copies at indie bookstore zine racks (ask permission first), coffee shop community boards, or hand them directly to people whose work you admire. Mail one to a friend with zero explanation and see what happens.
Gear Up for Your Quest
The gear that makes this quest work.
Pull it off

Pigma Micron Pen Set
These pens photocopy perfectly without smudging or fading, and the archival ink won't bleed through thin paper. The variety of tip sizes lets you do fine detail work and bold titles on the same page.
Get on Amazon · $12.64 — Pigma Micron Pen Setdetails & deals →+ complete the kit — 2 more

Glue Stick (Acid-Free)
RecommendedLiquid glue warps paper and takes forever to dry. Acid-free glue sticks let you attach photos, magazine cutouts, or printed elements without wrinkling. Dries instantly so you can keep working.
Archival quality glue stick for collage work
Get on Amazon · $4.48 — Glue Stick (Acid-Free)details & deals →
Kitchen scissors leave rough edges and can't do detail cuts. A craft knife gives you clean lines for windows, pop-ups, or precise collage trimming. The mat protects your table and extends blade life.
Precision cutting knife with replaceable blades and protective cutting surface
Get on Amazon · $6.39 — Craft Knife with Self-Healing Matdetails & deals →RELATED GEAR GUIDE
Phone Photography Kit: 9 Picks for Better Shots
Field-tested picks · Creative Arts
As an Amazon Associate, IRL Sidequests earns from qualifying purchases at no extra cost to you.
Prices and availability are subject to change. The price shown at checkout on Amazon at the time of purchase will apply.
Editor's Picks
Hand-selected quests our team thinks you'll love

Dawn Patrol: Your First Bird Watching Adventure
Wake up with the birds and see your neighborhood through new eyes.

Creative Skills Quest Hub: Learn By Doing
The best way to learn creative skills? Make bad art until it gets good.

Hand-Built Ceramic Bowl Workshop
Your hands built the first bowls 20,000 years ago. They still can.