Shoot all 36 frames with a friend, develop the roll yourselves, then hold the dry strip to a window and each pick a winner out loud. Give the worst frame a gloriously bad title too.
Bonus challenge: Agree on a secret theme before you shoot, like doorways or hands, and see if the other person spots it in the negatives.
Accept this questSaves it to your list, no account needed.
Time
3-4 hours (shooting + developing)
Cost
Free with your own gear
Starter gear from $166
The camera, tank and thermometer are one-time buys. After that each roll runs about $10–15 in film and chemicals.
friends, date night, solo · Adults and teens 16+; younger teens can shoot, but an adult handles the chemicals
Level
Intermediate
Where
Both
Season
Year-round
About This Quest
Want to see your own photographs appear in your hands? Grab a friend, load an old manual camera with black-and-white film, shoot 36 pictures together over a few days, then develop the roll on your kitchen counter and hold the wet strip up to the light together.
Film has no preview screen. You get 36 pictures, you can't delete the one you fumbled, and you won't know what you caught until the film is hanging up to dry. That wait is the best part.
You and a friend will share a roll, shoot it around town, then pour three liquids through a little tank and bring the pictures out yourselves. The camera sounds complicated for about ten minutes, and then it isn't. Your goal: one roll shot together, developed together, and a winner picked out loud.
Why This Quest Matters
Your phone has thousands of photos you'll never look at again. This gives you 36 you chose on purpose, and the first time you lift that damp strip to the window and see faces you recognize, you'll understand why people never stopped doing this. You didn't download these pictures. You made them appear.
What You'll Experience
Shoot without a safety net: No screen to peek at, no deleting, just you, your friend and 36 frames.
Feel your way in the dark: Load the film blind and come out grinning, because your fingers already knew how.
Watch pictures appear: Lift the wet film to the light and see what the two of you caught.
Crown a best and a worst: Hang the strip up and argue over which frame deserves which title.
What You'll Need
Top gear to make this quest great.
Pull it off
35mm Film Developing Tank Kit
Lets you develop in a normal lit room once the film is sealed inside in the dark.
As an Amazon Associate I earn from qualifying purchases. Prices may change.
Before You Begin
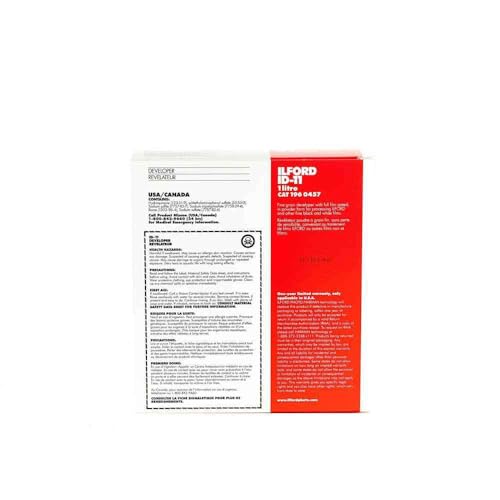
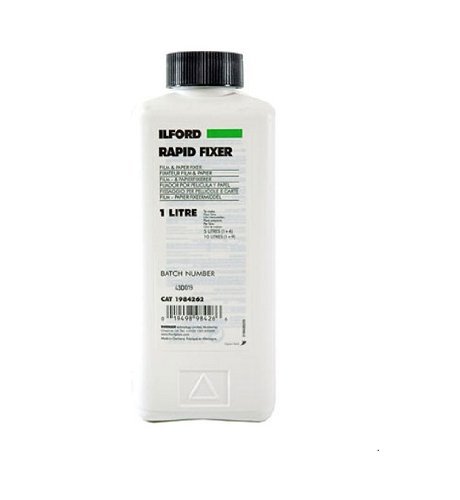
Call your photo buddy first, then gather the kit: most of it lasts for years. Essential: a manual 35mm film camera (a Canon AE-1, Pentax K1000 or Nikon FM2 from the 1970s to 90s), a roll of ISO 400 black-and-white film, a light-tight developing tank with a spiral reel, the three liquids (developer, stop bath and fixer) and a darkroom thermometer. Handy extras: a changing bag, so you can load film at any table instead of hunting for a dark room; an old junk roll to practice loading; and nitrile gloves. Film is sold by name at camera shops: ask for Ilford HP5+ or Kodak Tri-X.
Safety Tips
A good quest stays a good story. These are general notes; your gear's manual, the venue's rules and local law come first.
Wear nitrile gloves for every pour, and follow the mixing and timing instructions printed on the developer, stop bath and fixer bottles.
Run the bathroom fan or open a window while you work: stop bath and fixer give off acidic fumes that sting eyes and throats in a closed room.
Use a tank, jugs and trays you never use for food, and label each bottle with what's inside, how it's diluted and the date.
Never pour photo chemicals into a drink bottle or food container, and never mix developer and fixer together.
Store everything closed and well out of reach of children and pets.
Rinse any splash off your skin straight away. If developer gets in your eyes, flush with water for 15 minutes and call a doctor. Used fixer holds dissolved silver and is often banned from the drain, so check your local disposal rules before tipping it out.
Step-by-Step Guide
1
Wake Up The Camera
25 min
Before the film goes in, give your camera a quick checkup with your friend watching. Turn the speed dial through every setting and fire the shutter at each one: the slow speeds should sound smooth, not stuttery. Open the back and look at the black foam strip around the door. If it's gummy or crumbling, light is leaking in and a cheap replacement strip fixes it.
💡 Pro Tips:
• If the little light meter in the viewfinder is dead, it almost always just needs a fresh button battery.
2
Load Up And Shoot Together
90 min
Slide the film's tongue onto the spool on the other side, wind until the little teeth grip both edges, close the back and fire two throwaway shots. Now go wander for a few days and take turns with the camera. In bright sun with ISO 400 film, set the aperture to f/16 and the shutter to 1/125 and you're there. Anywhere else, follow the needle in the viewfinder.
💡 Pro Tips:
• Shoot the frame you're unsure about. Those are the ones you'll both crowd around later.
3
Practice Blindfolded
15 min
Here's the part that trips everyone up, so you'll beat it in the kitchen with the lights on. Take an old junk roll and curl it onto the spiral reel while you watch. Then do it again with your eyes closed, and again, until your fingers know the feel. Five clean runs and you're ready. Make it a race with your friend and see who's smoother.
💡 Pro Tips:
• A changing bag lets you load film at any table, so you never have to black out a window.
4
Into The Dark Tank
15 min
Real roll time. Wind the crank until the film pulls free inside the camera, then take it into a windowless bathroom or closet with the lights off (or into your changing bag). Pop the canister open with a bottle opener, snip the curved end off square, spiral it onto the reel, and drop the reel in the tank. Lid on tight, lights back on, film safe.
💡 Pro Tips:
• Lay the opener, scissors, reel and lid out in the same spots every time so your hands can find them.
5
Pour, Wait, Reveal
50 min
Gloves on, fan running, friend on timer duty. Warm or cool all three liquids to 68°F and trust the thermometer, because two degrees off changes how the pictures come out. Pour in the developer, turn the tank upside down 4 or 5 times, then 3 or 4 more flips every 30 seconds for the time on your film's instruction slip. Dump it, stop bath 30 seconds while flipping constantly, then fixer for 5 to 8 minutes with a 10-second flip each minute.
💡 Pro Tips:
• The classic combination (HP5+ film with D-76 developer, diluted half and half with water) runs 9 minutes.
6
Hang It And Judge It
30 min
Rinse under running water for 5 to 10 minutes, then add one drop of wetting agent, the little bottle that stops water spots, to the last rinse. Now lift the strip to the window with your friend: there are your pictures. Clip it somewhere dust-free for 2 to 4 hours, then cut it into strips of five or six frames, pick your winners out loud and give the worst frame the silliest title you can both agree on.
💡 Pro Tips:
• Hang it in the shower with the door shut. It's the least dusty room in the house.
You two just made photographs from nothing but light and three liquids. Scan your winning frame, send it to your co-pilot, and load the next roll.
Grab a friend, one instant camera and a single pack of film, and spend an easy afternoon walking your streets. You get eight to ten shots between you, and every print develops right there in your hand. At the end you each pick a favorite and trade.
Analog Glitch Photography: Circuit Bend Your Camera
Break your camera on purpose—the glitches are the art.
Master analog glitch photography by circuit bending cameras, corrupting film data, and creating unpredictable visual artifacts through hardware manipulation.
The city transforms after dark—learn to capture what your eyes can't see.
Learn night photography fundamentals through hands-on shooting. Master manual settings, long exposure techniques, and light painting in urban and natural environments.