
Build a Home Studio for Audio Recording
Your closet already sounds better than most commercial studios—you just need to prove it.
About This Quest
Transform a spare room or closet into a functional recording space. Learn acoustic treatment, equipment placement, and signal flow for podcasts, music, or voiceover work.
Most home studios fail because people buy expensive gear before understanding their room. A $200 microphone in a treated closet will outperform a $2000 mic in a bare bedroom every time. The sound of your space—the reflections off walls, the rumble from the floor, the hum from your HVAC—matters more than any preamp. This quest walks you through building a functional recording environment using spatial awareness and material science, not magic. You'll identify your room's acoustic problems by clapping and listening for flutter echoes, then address them with strategic placement of absorption and diffusion. The goal isn't a silent chamber—it's a controlled space where you hear what you're actually recording. Corner bass traps kill the mud that makes vocals sound boxy. Panels at first reflection points stop that metallic ringing. A thick rug handles floor bounce. By the end, you'll have a signal chain that makes sense: sound source → microphone → interface → software. You'll know why your desk placement matters (early reflections off the desk ruin mixes), why closets make killer vocal booths (dense hanging clothes = broadband absorption), and how to troubleshoot ground loops before they ruin a take. This is the technical foundation that lets you focus on performance instead of fighting your environment.
Why This Quest Matters
A treated closet with a cheap mic will crush an expensive setup in a bare room every single time. You're building the technical foundation that lets you focus on performance instead of fighting phantom echoes and muddy low-end. Once your room is mapped and controlled, you'll finally hear what you're actually recording.
What You'll Experience
- How to diagnose acoustic problems by ear using claps and mirror tests
- Why corner bass traps and first reflection points matter more than expensive microphones
- Signal chain fundamentals: proper gain staging and ground loop elimination
- The difference between dead-sounding over-treatment and balanced acoustic control
- How to use spatial positioning and material science to shape your recording environment
What You'll Need
Top gear to make this quest great.
Pull it off
USB Audio Interface with XLR Input
Converts analog microphone signal to digital audio your computer understands, with clean preamps that add minimal noise to your recordings
Get on Amazon · $219.99 — USB Audio Interface with XLR Input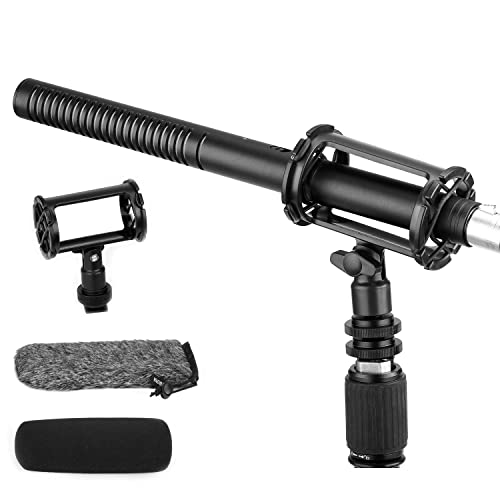
Captures detailed vocal and instrument recordings with natural tonality and good transient response—versatile for voice, acoustic guitar, room ambience
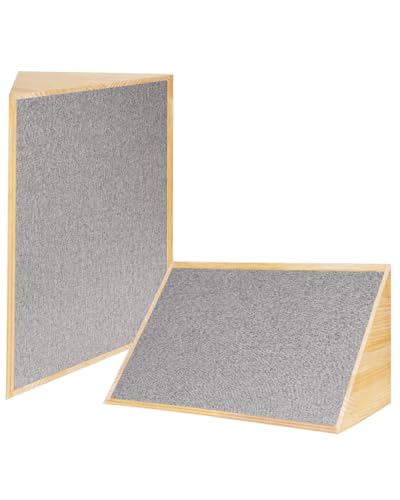
Absorbs low-frequency buildup in room corners that causes muddiness and boomy bass in recordings, the single most cost-effective acoustic treatment
As an Amazon Associate I earn from qualifying purchases. Prices may change.
Step-by-Step Guide
Test your room's acoustic signature
Pick a small room—spare bedroom, closet, or basement corner. Close all doors and windows, then clap sharply and listen for metallic ringing or flutter echo. That sound is what your treatment will eliminate.
💡 Pro Tips:
- • Smaller rooms are easier to treat than large spaces
- • Closets with dense hanging clothes already provide broadband absorption
Map problem zones with physics
Use the mirror trick: sit where you'll record, have someone slide a mirror along walls until you see your mic or speaker reflected—mark those first reflection points. Identify all corners where low-frequency mud accumulates. These marked spots are your treatment targets.
💡 Pro Tips:
- • First reflection points create that hollow, phasey comb filtering sound
- • Corners below 250Hz are why your vocals sound boxy and muddy
Install corner bass traps first
Mount 4-6 inch thick panels (rockwool or acoustic foam) floor-to-ceiling in all vertical corners where walls meet. These absorb sub-250Hz frequencies that thinner panels can't touch. Build them from rockwool insulation wrapped in breathable fabric on wooden frames, or buy commercial versions.
💡 Pro Tips:
- • Bass traps are non-negotiable—they kill the mud that ruins vocal recordings
Treat first reflection points strategically
Mount 2-inch acoustic panels at every marked spot on side walls, ceiling, and behind your position. Cover 20-30% of wall surface—more kills the room's life, less leaves it ringy. Alternate absorption panels with diffusion (bookshelves, DIY diffusers) to maintain natural ambience.
Position your recording setup geometrically
Form an equilateral triangle with speakers and your head (3-4 feet per side), pulled 2+ feet from walls. For vocal recording, aim the mic away from the nearest hard surface with treatment behind the singer. Run your signal chain: mic → interface → computer, setting gain so peaks hit -18dB to -12dB.
💡 Pro Tips:
- • Early reflections off your desk ruin mixes—position matters more than gear
- • Start monitoring with headphones until you've verified your room treatment works
Eliminate noise and verify response
Move computer fans and noisy gear out or into ventilated boxes. Fix ground loop buzz by running all gear through one power strip with balanced cables. Do a frequency sweep (20Hz-20kHz) while recording—consistent waveform amplitude means your room is balanced. Adjust treatment to smooth major peaks and dips above 200Hz.
💡 Pro Tips:
- • Record between HVAC cycles or shut it off temporarily
- • Document your final setup with photos and signal chain diagrams—when sound changes later, you'll know what moved
Gear Up for Your Quest
The gear that makes this quest work.
Pull it off

USB Audio Interface with XLR Input
Converts analog microphone signal to digital audio your computer understands, with clean preamps that add minimal noise to your recordings
Get on Amazon · $219.99 — USB Audio Interface with XLR Inputdetails & deals →+ complete the kit — 4 more

Captures detailed vocal and instrument recordings with natural tonality and good transient response—versatile for voice, acoustic guitar, room ambience
Cardioid pattern condenser mic with flat frequency response, requires phantom power
Get on Amazon · $87.50 — Large-Diaphragm Condenser Microphonedetails & deals →
Absorbs low-frequency buildup in room corners that causes muddiness and boomy bass in recordings, the single most cost-effective acoustic treatment
High-density foam wedges designed for corner mounting, 12" x 12" x 12" triangular shape
Get on Amazon · $139.00 — Acoustic Foam Corner Bass Traps (Set of 4)details & deals →
Acoustic Panels (Pack of 6-12)
RecommendedTreats first reflection points and flutter echoes, dramatically reduces room resonance and metallic ringing that ruins clarity
2-inch thick fabric-wrapped foam or fiberglass panels, 12" x 12" or 24" x 24"
Get on Amazon · $34.99 — Acoustic Panels (Pack of 6-12)details & deals →
Adjustable Microphone Boom Stand
RecommendedPositions mic precisely at mouth height without desk vibrations, lets you angle away from reflective surfaces, and keeps cables organized during long sessions
Heavy-base boom stand with cable clips and 360-degree rotation
Get on Amazon · $33.99 — Adjustable Microphone Boom Standdetails & deals →RELATED GEAR GUIDE
Phone Photography Kit: 9 Picks for Better Shots
Field-tested picks · Creative Arts
As an Amazon Associate, IRL Sidequests earns from qualifying purchases at no extra cost to you.
Prices and availability are subject to change. The price shown at checkout on Amazon at the time of purchase will apply.
Editor's Picks
Hand-selected quests our team thinks you'll love

Dawn Patrol: Your First Bird Watching Adventure
Wake up with the birds and see your neighborhood through new eyes.

Creative Skills Quest Hub: Learn By Doing
The best way to learn creative skills? Make bad art until it gets good.

Hand-Built Ceramic Bowl Workshop
Your hands built the first bowls 20,000 years ago. They still can.