
Build a Theremin from Scratch
Make music by waving your hands through electromagnetic fields like a wizard.
About This Quest
Solder, tune, and play the world's first touchless electronic instrument using vintage circuit designs and modern components.
The theremin hums and warbles as your hand approaches the antenna—no physical contact, just the invisible dance between your body's capacitance and oscillating radio frequencies. Built in 1920 by Soviet physicist Léon Theremin, this instrument generates sound through two metal antennas that sense hand position in three-dimensional space. The right antenna controls pitch; the left controls volume. It's the sound of 1950s B-movies, Beach Boys' "Good Vibrations," and every alien encounter soundtrack ever made. You'll build a simplified but fully functional theremin using a classic design based on two radio frequency oscillators. When you move your hands near the antennas, you change the capacitance in the circuits, which shifts the frequencies. The difference between these two frequencies becomes the audio you hear—a pure, eerie tone that slides seamlessly across octaves. The soldering takes patience, but the circuit is forgiving. Most issues come from cold solder joints or misaligned coils, both easy to fix once you know what to look for. Once assembled, tuning the oscillators is where the magic happens. You'll adjust variable capacitors and inductors until the instrument responds smoothly to hand movements within about 18 inches of the antennas. The sound ranges from deep, ghostly drones to sharp, whistling highs depending on how close your hand gets to the pitch antenna. Playing it well takes weeks of practice—your entire body becomes part of the circuit, so even your posture affects the tone. But making noise? That happens the first time you power it on.
Why This Quest Matters
You'll conjure sound from thin air using nothing but the electromagnetic field around your body—it's the closest thing to actual magic in electronics. The first time you power it on and hear that ghostly tone respond to your hand movements, you've joined a century-long tradition of builders and performers who've mastered this deeply weird, uniquely expressive instrument.
What You'll Experience
- How radio frequency oscillators and capacitance sensing create sound
- Soldering technique for complex circuits with multiple components
- Tuning and troubleshooting RF circuits by ear and measurement
- How your body's electrical properties interact with electromagnetic fields
- The relationship between hand position, gesture, and musical expression
What You'll Need
Top gear to make this quest great.
Pull it off
Theremin DIY Electronics Kit or Component Set
Provides all specialized components in the correct values—variable capacitors, RF coils, and matched oscillator parts that are hard to source individually. Eliminates guesswork in component selection.
Get on Amazon · $49.95 — Theremin DIY Electronics Kit or Component Set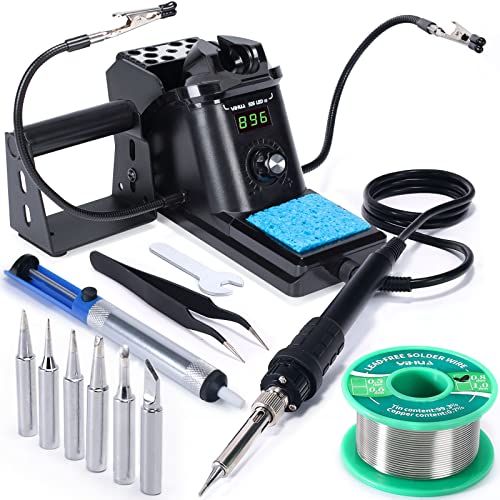
Consistent temperature prevents overheating sensitive ICs and creates clean solder joints. The fine tip reaches tight spaces on PCBs without bridging adjacent pads. Cold joints are the #1 cause of circuit failure in DIY projects.
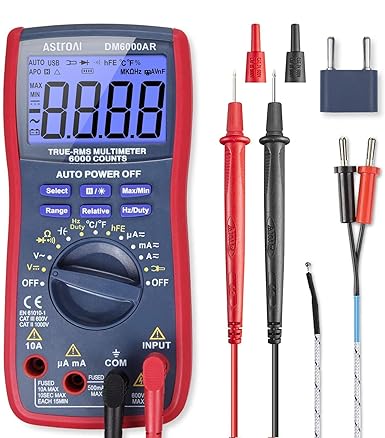
Essential for testing circuits, verifying component values, checking solder connections for shorts, and tuning the oscillators. Capacitance measurement confirms your variable caps are working. You'll use this for troubleshooting every step.
As an Amazon Associate I earn from qualifying purchases. Prices may change.
Step-by-Step Guide
Gather components and prep workspace
Collect your PCB, dual oscillator IC or discrete transistors, variable capacitors, inductors, copper tubing for antennas, resistors, capacitors, power supply, and enclosure. Print your schematic—many builders reference the Moog Etherwave design or simpler two-oscillator layouts from Open Theremin. Set up good lighting and ventilation, lay out components by value, and pre-tin your soldering iron tip.
💡 Pro Tips:
- • Use a helping-hands stand to hold the board steady while soldering
- • Start with lowest-profile components first—resistors and small capacitors—then work up to taller inductors and transistors
Solder the oscillator circuits
Insert each component, flip the board, solder both leads, and trim excess wire. Check every joint for shine and smooth fillets—cold joints look dull and grainy, so reheat if needed. The oscillator coils must sit flat and aligned; even slight tilts throw off tuning later.
💡 Pro Tips:
- • Work methodically through one oscillator at a time to avoid confusion
Mount antennas and wire connections
Attach variable capacitors and extend antennas 10-12 inches vertically from the board. The pitch antenna (right side) needs isolation from ground using standoffs; the volume antenna (left) is often a loop or plate. Wire the power supply and audio output jack with shielded cable, double-checking polarity to avoid frying ICs.
💡 Pro Tips:
- • Add strain relief to all antenna connections—they'll get bumped during use
- • Include an on/off switch and LED indicator if your design allows
Test and tune the oscillators
Power on and verify both oscillators generate signals in the 200-500 kHz range using a frequency counter or oscilloscope if available. Adjust the pitch variable capacitor until you hear a steady 1000 Hz tone with your hand 12 inches from the antenna—pitch should rise smoothly as you approach. Tune the volume circuit so the theremin stays silent at distance and reaches full volume when your hand is 2-3 inches from the volume antenna.
💡 Pro Tips:
- • If pitch jumps octaves or becomes unstable, check for loose antenna connections or nearby electronic interference
- • Reflow any suspect solder joints if oscillators won't generate signal
Install in enclosure and practice
Mount the circuit in a wood or plastic enclosure, positioning antennas at least 6 inches apart to prevent crosstalk. Avoid metal near the antennas—it disrupts the electromagnetic field. Connect to an amplifier at low volume and practice basic scales with steady, measured hand movements, using your other hand to shape volume dynamics like a conductor.
💡 Pro Tips:
- • Ground yourself and the instrument properly to reduce noise and instability
- • Keep the theremin away from fluorescent lights and monitors during use
Gear Up for Your Quest
The gear that makes this quest work.
Pull it off

Theremin DIY Electronics Kit or Component Set
Provides all specialized components in the correct values—variable capacitors, RF coils, and matched oscillator parts that are hard to source individually. Eliminates guesswork in component selection.
Get on Amazon · $49.95 — Theremin DIY Electronics Kit or Component Setdetails & deals →+ complete the kit — 4 more

Consistent temperature prevents overheating sensitive ICs and creates clean solder joints. The fine tip reaches tight spaces on PCBs without bridging adjacent pads. Cold joints are the #1 cause of circuit failure in DIY projects.
Adjustable soldering iron with fine tip and stable heat control, typically 60W with digital readout. Brands like Hakko or Weller are reliable.
Get on Amazon · $38.99 — Temperature-Controlled Soldering Stationdetails & deals →
Essential for testing circuits, verifying component values, checking solder connections for shorts, and tuning the oscillators. Capacitance measurement confirms your variable caps are working. You'll use this for troubleshooting every step.
Handheld multimeter that measures voltage, resistance, continuity, and capacitance. Models with auto-ranging and backlit display make testing easier.
Get on Amazon · $34.99 — Digital Multimeter with Capacitance Functiondetails & deals →
Mini Amplifier or Portable Speaker
RecommendedTheremin output is line-level audio that needs amplification to hear clearly. A dedicated practice amp lets you tune and play without routing through a full stereo system. Instantly reveals tuning issues and circuit problems through audio feedback.
Small powered speaker with 3.5mm input jack and volume control. Battery-powered models allow testing without being tethered to a wall outlet.
Get on Amazon · $56.68 — Mini Amplifier or Portable Speakerdetails & deals →
Keeps the board perfectly still so both hands are free for iron and solder. The magnifier reveals tiny solder bridges and cold joints that are invisible to the naked eye. Reduces frustration and rework time significantly.
Adjustable clamps with weighted base and built-in magnifying glass. Holds PCB and components steady while you solder.
Get on Amazon · $24.99 — Helping Hands Soldering Station with Magnifierdetails & deals →RELATED GEAR GUIDE
Phone Photography Kit: 9 Picks for Better Shots
Field-tested picks · Creative Arts
As an Amazon Associate, IRL Sidequests earns from qualifying purchases at no extra cost to you.
Prices and availability are subject to change. The price shown at checkout on Amazon at the time of purchase will apply.
Editor's Picks
Hand-selected quests our team thinks you'll love

Dawn Patrol: Your First Bird Watching Adventure
Wake up with the birds and see your neighborhood through new eyes.

Creative Skills Quest Hub: Learn By Doing
The best way to learn creative skills? Make bad art until it gets good.

Hand-Built Ceramic Bowl Workshop
Your hands built the first bowls 20,000 years ago. They still can.