Shoot your model under two different street lights, one warm and one cool, then show them the back of the camera and let them pick the single best frame. Win when they ask you to send it right now.
Bonus challenge: Swap roles for ten minutes and let your model photograph you under the same lamp.
Accept this questSaves it to your list, no account needed.
Time
2-3 hours
Cost
Free with your own gear
Starter gear from $207
Free if you already own a camera and a fast prime lens. A beginner-friendly 50mm f/1.8 runs about $200, and a reflector is around $30. No per-session cost beyond charged batteries.
friends, date night, solo · Adults and teens 16+ with an adult along after dark
Level
Intermediate
Where
Outdoor
Season
Fall-Winter
Earlier sunset provides longer shooting window. Cooler temps keep models comfortable under warm street lights.
About This Quest
Grab a friend who's willing to be your model and head out thirty minutes after sunset, when the street lights flick on and the sky is still deep blue. You'll turn a plain sidewalk lamp into a portrait light and come home with photos that look like a film still.
Street lights are free studio lighting, and they look incredible the moment the sky goes blue. For about forty minutes after sunset, that warm orange glow and the cool blue above mix into something you simply cannot fake indoors.
You'll scout a few lamps in daylight, come back at blue hour with your model, and shoot twenty to thirty frames at each spot. Moving someone six inches changes the whole mood of their face, so even your first attempts will surprise you. Your job tonight: make one portrait your model wants as their profile picture. There are more side quests to do at night when you get hooked.
Why This Quest Matters
Most photos of friends happen under whatever light is around. Tonight you get to choose the light, and watch someone you know look like the lead in a movie. The best part is handing them the camera and seeing their face when they realize that's them.
What You'll Experience
Catch the blue hour: Shoot in the short window when lamps glow warm and the sky is still blue.
Sculpt a face with six inches: Nudge your model slightly and watch the shadows completely redraw them.
Chase the catchlights: Get tiny reflections of the street lamp sparkling in your model's eyes.
Pull off the big reveal: Hand over the camera and watch your friend find their new favorite photo.
What You'll Need
Top gear to make this quest great.
Pull it off
Fast Prime Lens (35mm, 50mm, or 85mm f/1.8 or wider)
A wide f/1.8 aperture gathers enough street light for sharp portraits and melts the background into soft glow.
As an Amazon Associate I earn from qualifying purchases. Prices may change.
Before You Begin
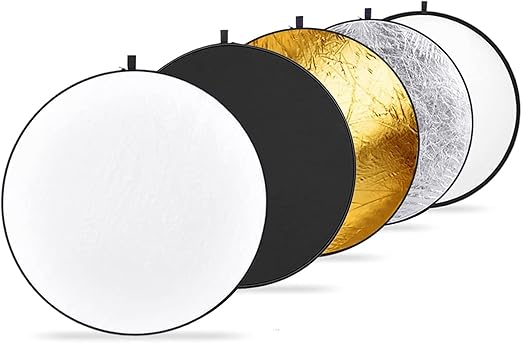
Pick your model first, because the whole night is more fun with a partner. You'll want a camera that shoots in manual mode, a fast prime lens (35mm, 50mm or 85mm at f/1.8 or wider), two charged batteries, and something reflective or light-colored to wear. A 24-inch 5-in-1 collapsible reflector bounces light back into shadowed cheeks, a wireless remote shutter frees your hands, and a small bi-color LED stick helps when a lamp sits badly. Stick to public sidewalks. Parking garages, loading docks, alleys and transit property need permission.
Safety Tips
A good quest stays a good story. These are general notes; your gear's manual, the venue's rules and local law come first.
Never set up in a traffic lane, a bike lane or a driveway. Both of you stand well back on the sidewalk, and watch for cars turning in.
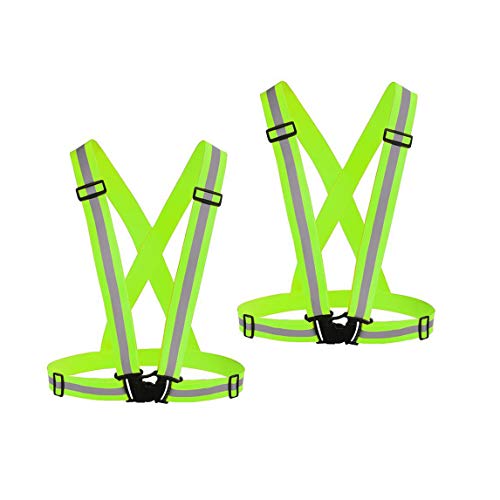
Wear reflective or light-colored clothing so drivers see you. Keep the camera slung close and low-key between spots rather than hiding it under a coat, which makes you less visible.
Choose sidewalks with some ambient light and foot traffic, not isolated dark stretches. Scout them in daylight first.
Shoot with a partner, tell someone else your locations and when you'll be back, and keep your phone charged.
Stay on public sidewalks. Parking garages, loading docks, private alleys and transit property require permission, and if staff or security ask you to leave, leave right away.
Get spoken permission from anyone recognizable who ends up in a frame.
Step-by-Step Guide
1
Scout in Daylight
30 min
Walk your route while the sun is still up and hunt for three to five street lights that stand alone, each with about ten to fifteen feet of clear sidewalk around them. Note which way each lamp leans so you know where the light will fall. Look for one warm orange lamp and one cool white or neon sign for contrast later.
💡 Pro Tips:
• Drop a pin on each spot in your phone's map app so you're not wandering around in the dark.
2
Dial In the Camera
15 min
Thirty minutes after sunset the lamps come on and the sky stays blue for roughly forty minutes, so be ready before that. Set your camera to manual mode and RAW, then f/2.0, ISO 1600 and a 1/80 shutter. Fire one test frame and check the histogram: skin tones should sit in the right third without hitting the edge.
💡 Pro Tips:
• Load the second battery in your pocket now. Cold air drains the first one faster than you expect.
3
Place Your Model
20 min
Stand your friend six to eight feet from the lamp and turn them until the light hits their face at a 30 to 45 degree angle, never straight down from overhead. Sweep your phone flashlight across their face first to preview where shadows land. Then look for catchlights, the little reflections of the lamp in their eyes. When you see them, you're in the right spot.
💡 Pro Tips:
• Move them six inches and look again. That tiny shift can take a face from flat to dramatic.
4
Shoot the First Lamp
25 min
Now fill the card. Shoot twenty to thirty frames here, firing three-frame bursts each pose so a blink doesn't cost you the shot. Have them look into the light, then at you, then turn to profile. Slide your aperture between f/1.8 and f/4 to see how much of the background melts. Hold the reflector low to bounce light back into the shadowed cheek.
💡 Pro Tips:
• Talk while you shoot. People relax about frame five, and that's where the good ones live.
5
Switch to Cool Light
25 min
Walk to your second spot, the one with the cool white LED or neon glow, and run the same routine. The color shift alone makes your model look like a different person. Shoot another twenty to thirty frames, then zoom in on a few and check three things: eyes sharp, no motion blur, and the face brighter than the background.
💡 Pro Tips:
• If the lamp sits awkwardly overhead, hold a small LED stick off to one side at low power to rebuild the angled light.
6
The Reveal and Edit
30 min
Hand your friend the camera and let them scroll. Whichever frame makes them go quiet is the keeper. Back home, pull that RAW file up and nudge the white balance either toward the orange for mood or away from it for natural skin, then lift the shadows slightly, pull the highlights down and add a soft vignette. Send it to them immediately.
💡 Pro Tips:
• Save a warm version and a neutral version of the same frame. Your model will have a strong opinion.
You just made a street lamp do the work of a studio light, and your friend has a new favorite photo of themselves. Send them the file tonight and book the next lamp.
Go back until the neighborhood waves instead of posing.
Pick one ordinary corner near you, grab a friend, and go photograph it. Then go back. By the second visit the fruit seller stops noticing you and waves instead, and that's when the honest pictures show up. Your prize at the end: a 10 to 15 photo story of a place nobody else bothered to look at.