Natural Dye Foraging & Fabric Printing
That weed growing in the parking lot crack? It'll dye your shirt purple.
About This Quest
Learn to identify wild plants for natural dyes, extract rich colors, and create botanical prints on fabric using foraged materials from your local environment.
Natural dye foraging combines plant identification, chemistry, and textile art into one messy, rewarding afternoon. You'll learn to spot common urban and wild plants that yield surprising colors—goldenrod for mustard yellow, pokeberries for magenta, black walnut husks for deep brown. The process is simple: forage responsibly, simmer your finds in water, add fabric pre-treated with mordant (a fixative), and watch fibers absorb pigments that store shelves can't replicate. The real skill is learning which plants give what colors, and it's not intuitive. Red flowers rarely make red dye. Green leaves often produce yellow. You'll develop an eye for tannin-rich barks, berry-heavy shrubs, and mineral-laden roots. Start with abundant, invasive species—Japanese knotweed, dandelions, dock—so you're helping ecosystems while you create. Keep a dye journal with fabric swatches; colors shift with water pH, mordant choice, and plant maturity. Beyond immersion dyeing, you can create botanical contact prints by hammering fresh plants directly onto mordanted fabric. The chlorophyll and pigments transfer, leaving detailed leaf prints. It's immediate, tactile, and perfect for kids or quick projects. Pair this with basic sewing skills and you've got custom textiles that carry real stories—that scarf came from the blackberries behind the library, this napkin from oak galls in the park.
Why This Quest Matters
You'll wear colors that don't exist in stores—pigments pulled from sidewalk weeds, park trees, and kitchen scraps. Each piece carries a story you can point to: that scarf came from blackberries behind the library, this napkin from oak galls in the park. Your dye journal becomes a seasonal record of what grows where, a map of your ecosystem written in fiber and color.
What You'll Experience
- Which common urban and wild plants yield surprising colors
- How to identify tannin-rich barks, berry shrubs, and dye-producing roots
- The chemistry of mordants and how water pH shifts pigments
- Botanical contact printing techniques using fresh plant material
- A working knowledge of invasive species you can harvest guilt-free
What You'll Need
Top gear to make this quest great.
Pull it off
Alum Mordant Powder
Essential for making natural dyes permanent on fabric—without it, colors fade completely after one wash. Alum is the safest, most accessible mordant for beginners.
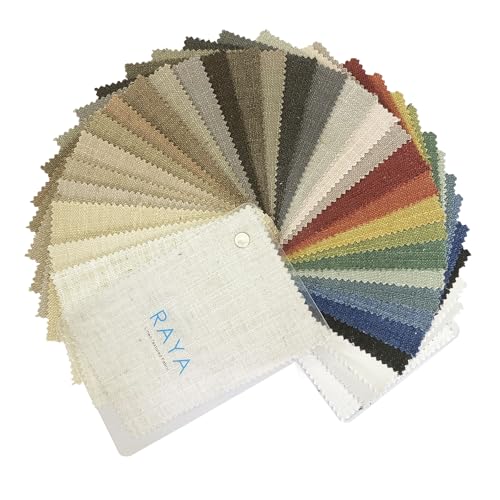
Get on Amazon · $13.66 — Alum Mordant PowderDifferent fibers absorb dyes differently—this lets you test which fabrics take your foraged colors best before committing to larger projects. Silk typically gives the richest tones.
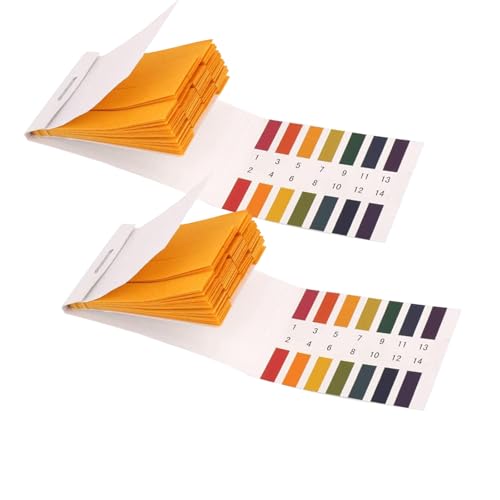
Water pH dramatically changes dye colors—adding vinegar (acid) or baking soda (alkaline) to your dye bath can shift yellows to orange or blues to green. Testing lets you control and replicate results.
As an Amazon Associate I earn from qualifying purchases. Prices may change.
Step-by-Step Guide
Research and identify dye plants
Find safe, abundant plants in your area that produce dyes—yellow dock, marigolds, onion skins saved from cooking, or black walnut husks. Positively ID every plant before harvesting and avoid protected species. Focus on invasive species like Japanese knotweed or dandelions so you're helping ecosystems.
💡 Pro Tips:
- • Red flowers rarely make red dye, and green leaves often produce yellow—dye colors are counterintuitive
- • Start a list of tannin-rich barks, berry-heavy shrubs, and mineral-laden roots in your neighborhood
Pre-treat fabric with mordant
Simmer 100g of natural fabric (cotton, linen, or silk) in 4 liters of water with 12g alum powder for 1 hour. Rinse and let dry. This fixative helps dyes bond permanently to fibers. You can prepare mordanted fabric days ahead and store it until you're ready to forage.
💡 Pro Tips:
- • Mordant choice affects final color—alum gives true tones, iron darkens, copper shifts toward green
Forage your dye materials
Collect 2-3 cups of plant material per fabric piece. Pick leaves and flowers in morning after dew dries, choose overripe berries, and take roots or bark only from abundant sources or fallen wood. Harvest responsibly—never strip a plant bare.
💡 Pro Tips:
- • Plant maturity changes color output—early spring dandelions give different yellows than fall ones
Create the dye bath
Chop plant material coarsely and simmer in a large pot with enough water to cover your fabric, using a 1:1 ratio of plant material to fabric weight. Simmer 1-2 hours until the water is richly colored, then strain out all plant matter.
💡 Pro Tips:
- • Your tap water's pH affects final color—acidic water shifts toward orange, alkaline toward blue-green
Dye the fabric or hammer prints
For immersion dyeing, add wet mordanted fabric to the strained dye bath and simmer gently for 1 hour, stirring occasionally. For botanical prints, place fresh leaves or flowers on damp mordanted fabric, cover with scrap cloth, and hammer firmly with a rubber mallet. Colors look darker when wet—test a corner and let it dry to check the true shade.
💡 Pro Tips:
- • Botanical printing transfers chlorophyll and pigments directly, leaving detailed leaf vein patterns
- • Keep the mallet strikes even and firm—tentative taps won't release enough pigment
Rinse, dry, and document results
Rinse dyed fabric in cool water until it runs clear, then hang to dry away from direct sun. Hand-wash separately for the first few washes as some dye may release. Record plant species, harvest date, mordant used, simmer time, and final color in a journal with fabric swatches—your notes become a personal dye map since colors shift with seasons and soil conditions.
Gear Up for Your Quest
The gear that makes this quest work.
Pull it off

Alum Mordant Powder
Essential for making natural dyes permanent on fabric—without it, colors fade completely after one wash. Alum is the safest, most accessible mordant for beginners.
Get on Amazon · $13.66 — Alum Mordant Powderdetails & deals →+ complete the kit — 4 more

Different fibers absorb dyes differently—this lets you test which fabrics take your foraged colors best before committing to larger projects. Silk typically gives the richest tones.
Pre-cut swatches of cotton, linen, and silk for testing dye colors
Get on Amazon · $12.99 — Natural Fiber Sample Packdetails & deals →
pH Test Strips
RecommendedWater pH dramatically changes dye colors—adding vinegar (acid) or baking soda (alkaline) to your dye bath can shift yellows to orange or blues to green. Testing lets you control and replicate results.
Litmus strips for testing water acidity/alkalinity
Get on Amazon · $3.99 — pH Test Stripsdetails & deals →
Fine Mesh Strainer Bag
RecommendedKeeps plant debris from sticking to fabric and makes cleanup instant—just lift out the bag instead of straining gallons of hot liquid. Also useful for bundling plants directly against fabric for uneven, organic patterns.
Reusable nylon mesh bag for containing plant material during simmering
Get on Amazon · $6.99 — Fine Mesh Strainer Bagdetails & deals →
Rubber Mallet
OptionalTransfers plant pigments onto fabric through direct impact without tearing delicate leaves or bruising fabric. Creates museum-quality botanical prints in minutes.
Non-marring hammer for botanical contact printing
Get on Amazon · $9.99 — Rubber Malletdetails & deals →RELATED GEAR GUIDE
Phone Photography Kit: 9 Picks for Better Shots
Field-tested picks · Creative Arts
As an Amazon Associate, IRL Sidequests earns from qualifying purchases at no extra cost to you.
Prices and availability are subject to change. The price shown at checkout on Amazon at the time of purchase will apply.
Editor's Picks
Hand-selected quests our team thinks you'll love

Dawn Patrol: Your First Bird Watching Adventure
Wake up with the birds and see your neighborhood through new eyes.

Creative Skills Quest Hub: Learn By Doing
The best way to learn creative skills? Make bad art until it gets good.

Hand-Built Ceramic Bowl Workshop
Your hands built the first bowls 20,000 years ago. They still can.