Multicraft Studio Sprint: Sample 3 Making Skills in One Day - Creative Arts quest for Beginner level adventurers

Multicraft Studio Sprint: Sample 3 Making Skills in One Day

Three studios, three skills, one afternoon—find your medium.

Share:
3 supplies needed· Estimated total: Free
View supplies

About This Quest

Rotate through three different making stations—pottery wheel, laser cutter, and block printing—at local makerspaces to find your creative medium.

Most maker studios offer intro sessions, but you rarely try multiple crafts back-to-back. This quest changes that. You'll book beginner slots at three different makerspaces on the same day—pottery throwing in the morning, laser cutting after lunch, block printing in late afternoon. The contrast reveals what clicks for you: some people love the wet mess of clay, others geek out on digital precision, and some discover they've been a printmaker all along. The pottery wheel will fight you at first—centering clay takes muscle memory you don't have yet. Your instructor will guide your hands, but that wobbling lump becomes hypnotic once you nail it. The laser cutter studio smells like burnt plywood and ozone; you'll design a small box or coaster in vector software, then watch the beam trace your lines with surgical accuracy. Block printing is quieter—carving linoleum with gouges, rolling ink onto the raised surface, pressing paper by hand. You'll leave with a mug that's slightly lopsided, a geometric coaster, and five hand-printed cards. Most cities have multiple makerspaces—community workshops, art centers, or university fab labs that offer walk-in classes. Call ahead to cluster your sessions geographically. Wear clothes you can trash (pottery splatter doesn't wash out easily). Between sessions, grab lunch and compare the headspace each craft puts you in. By evening, you'll know whether you're drawn to analog, digital, or somewhere in between.

Why This Quest Matters

Most people try one craft and assume it's not for them, but switching media back-to-back reveals what actually clicks. You'll feel the difference between clay that fights your hands, software that obeys perfectly, and linoleum that carves like cold butter. By evening you'll know whether you're an analog maker, a digital fabricator, or someone who needs both—and you'll have three weird, wonderful objects to prove you tried.

What You'll Experience

  • Whether you're drawn to tactile mess, digital precision, or hand-pressure crafts
  • How to center clay on a pottery wheel and pull up basic walls
  • Vector design basics and how laser cutters translate files to cuts
  • Linoleum carving technique and relief printing fundamentals
  • Which local makerspaces fit your style and budget for future sessions
Duration
6-8 hours
Estimated Cost
Free
Location
Indoor
Season
Year-round
Family Friendly
All ages welcome

What You'll Need

Top gear to make this quest great.

Carving Glove
Carving Glove

Protects your non-dominant hand while carving block prints, especially as a beginner when knife control is unpredictable

$11.99
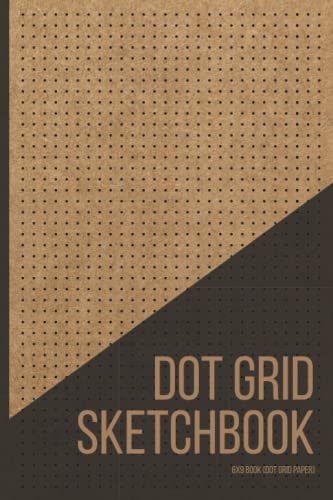
Sketchbook with Grid Pages

Grid structure helps translate designs into vector files for laser cutting and plan symmetrical block print compositions

$3.99
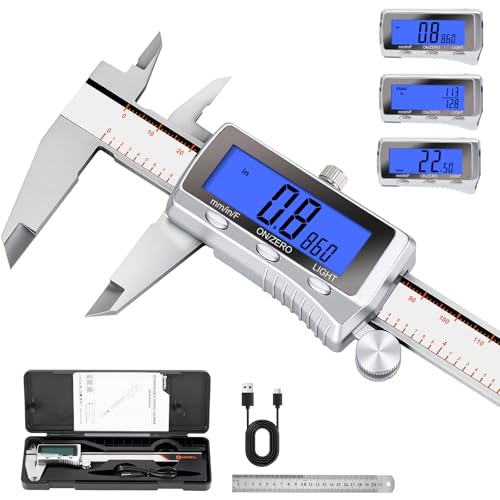
Digital Caliper
Digital Caliper

Measures exact dimensions for laser-cut joinery and pottery wall thickness—turns guessing into precision

$34.59

As an Amazon Associate I earn from qualifying purchases. Prices may change.

Step-by-Step Guide

1

Map and book your three studios

Find makerspaces within 30 minutes of each other offering intro pottery, laser cutting, and block printing. Book slots for the same day: pottery morning (9-10AM), laser cutting midday (1PM), block printing late afternoon (4PM+). Call ahead to confirm times cluster geographically.

💡 Pro Tips:

  • University fab labs and community art centers often run cheaper intro sessions than private studios
  • Ask if studios provide materials or if you need to bring anything beyond old clothes
2

Wrestle clay at the pottery wheel

Arrive 10 minutes early to sign waivers. Your instructor will guide your hands through centering—press down hard, lean in with your body weight, and expect the lump to wobble wildly at first. Once centered, pull up walls slowly to form a mug or bowl. Wear clothes you can destroy; clay splatter is permanent.

💡 Pro Tips:

  • Centering is 80% pressure and 20% finesse—don't be timid with that first push
  • Keep a wet sponge in your non-dominant hand to maintain moisture while shaping
3

Design and laser-cut your geometry

Sketch your coaster or small box on paper first, then translate it into the studio's vector software using provided templates. Watch the laser beam trace your lines through plywood or acrylic with surgical precision. The studio will smell like burnt wood and ozone—embrace it.

💡 Pro Tips:

  • Simple geometric designs cut cleaner than intricate curves for first-timers
  • Ask to watch someone else's cut finish before yours starts so you know what to expect
4

Carve and print your block

Use linoleum gouges to carve away negative space in your block—what you leave raised will hold ink. Roll a thin, even layer of ink onto the surface, then press paper firmly with a baren or the back of a wooden spoon. Print five cards to test pressure and ink density.

💡 Pro Tips:

  • Carve away from your body and keep your other hand behind the blade path
  • Your first print will be too light—add more ink and press harder on the second pull
5

Journal between sessions and compare

Grab lunch and write quick notes: what felt intuitive, what frustrated you, what made time disappear. Photograph your pieces and each studio's setup—tools, noise levels, energy. Notice whether you're drawn to wet mess, digital precision, or hand pressure.

💡 Pro Tips:

  • Pay attention to which studio made you want to stay late versus which one felt like homework
6

Ask about next steps before leaving

At your final studio, ask instructors about drop-in hours, membership costs, or multi-week courses. You'll leave with a lopsided mug, a geometric coaster, five hand-printed cards, and clarity about your maker medium.

Full gear guide
Phone Photography Kit: 9 Picks for Better Shots
See all picks →

Gear Up for Your Quest

Get everything you need to make this quest amazing.

Carving Glove

Carving Glove

Recommended
$11.99

Protects your non-dominant hand while carving block prints, especially as a beginner when knife control is unpredictable

Cut-resistant glove for linoleum carving

Get on Amazon · $11.99

Sketchbook with Grid Pages

Sketchbook with Grid Pages

Recommended
$3.99

Grid structure helps translate designs into vector files for laser cutting and plan symmetrical block print compositions

Dot grid or graph paper sketchbook for planning designs

Get on Amazon · $3.99

Digital Caliper

Digital Caliper

Optional
$34.59

Measures exact dimensions for laser-cut joinery and pottery wall thickness—turns guessing into precision

Precision measuring tool for maker projects

Get on Amazon · $34.59

RELATED GEAR GUIDE

Phone Photography Kit: 9 Picks for Better Shots

Field-tested picks · Creative Arts

As an Amazon Associate, IRL Sidequests earns from qualifying purchases at no extra cost to you.

Prices and availability are subject to change. The price shown at checkout on Amazon at the time of purchase will apply.