Mixed-Media Collage Storytelling - Creative Arts quest for Beginner level adventurers

Mixed-Media Collage Storytelling

Your junk drawer holds better stories than most novels.

Share:
4 supplies needed· Estimated total: $30 - $60
View supplies

About This Quest

Transform collected ephemera, textures, and found materials into layered collage narratives that tell your story without words.

Most people toss ticket stubs, magazine clippings, and fabric scraps. You're going to turn them into visual autobiography. Mixed-media collage lets you build layers of meaning using materials that already carry emotional weight—the concert ticket from your first date, the paint chip from your apartment hunt, the newspaper headline from the day everything changed. This isn't elementary school cut-and-paste. Real collage work involves composition theory, color relationships, and texture dynamics. You'll learn to balance busy patterns with breathing room, create focal points through contrast, and use transparent layers to suggest depth. The physical act of arranging pieces until something clicks is part meditation, part archaeological dig into your own memory. Start with one theme or emotion. Pull materials that connect to it—don't overthink, trust your gut. Spread everything on your work surface and start moving pieces around. The magic happens when you place something unexpected next to something obvious and suddenly see a new meaning emerge. That's when you reach for the gel medium.

Why This Quest Matters

You'll create a physical object that holds multiple timelines at once—that concert ticket next to a fabric scrap from your grandmother's dress tells a story no words could capture. The process itself is archaeological: you dig through your collected materials and discover what matters by what your hands keep reaching for. When you finish, you'll have a layered visual autobiography that gets richer every time you look at it.

What You'll Experience

  • How to build visual depth through layering and transparency
  • Composition techniques using contrast, color theory, and negative space
  • Physical adhesion methods for different material weights and textures
  • How to create focal points that guide the viewer's eye
  • The emotional power of repurposing objects that already carry memory
Duration
2-3 hours
Estimated Cost
$30 - $60
Location
Indoor
Season
Year-round
Family Friendly
All ages welcome

What You'll Need

Top gear to make this quest great.

Professional Gel Medium
Professional Gel MediumPopular

Bonds everything from paper to fabric without warping or bubbling, and creates archival-quality seal

$13.46
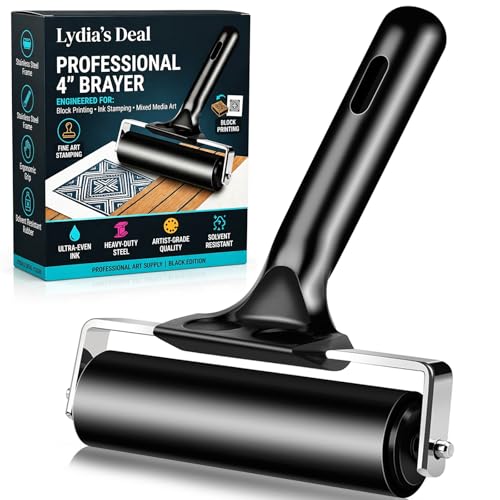
Brayer Roller
Brayer Roller

Eliminates air bubbles and ensures even adhesion without tearing delicate papers

$6.69
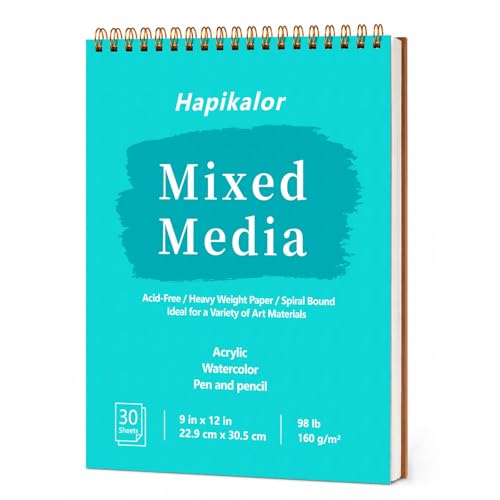
Mixed-Media Paper Pad

Heavy enough to handle wet media without warping, textured surface grips materials

$6.99
View all 4 supplies

As an Amazon Associate I earn from qualifying purchases. Prices may change.

Step-by-Step Guide

1

Prep your substrate and sort materials

Choose heavy watercolor paper, wood panel, or canvas board—spray with matte medium if the surface is too slippery. Sort your collected ephemera into piles: paper items (maps, tickets, book pages), textures (fabric, lace, mesh), patterns (magazines, scrapbook paper), and dimensional objects (buttons, dried flowers, string). Pick 3-5 colors that will dominate your piece and set aside anything outside that palette.

💡 Pro Tips:

  • Torn paper edges blend more naturally than cut ones and feel less rigid
  • Too many colors creates visual chaos—be ruthless about your palette
2

Build your background layers

Start with your largest background pieces. Apply matte gel medium to your substrate, place the paper, then seal over the top. Smooth out bubbles with a brayer or credit card. Overlap edges and vary opacity using tissue paper or translucent materials—don't cover everything. Empty space gives the eye room to rest.

💡 Pro Tips:

  • Let some pieces peek from behind others to create depth
3

Create your focal point

Add the element your eye lands on first—this is your visual punch. Use contrast here: place dark against light, smooth against textured, or simple against complex. This is where the meaning you're building becomes clear.

4

Attach dimensional elements

Add buttons, dried flowers, string, or other three-dimensional items last. Use gel medium for lightweight pieces or craft glue for heavier objects. Press firmly and cure flat under books if needed. Let everything dry completely for at least 2 hours before touching it.

5

Unify with drawing or painting

Use charcoal, pencil, or acrylic paint to tie disparate elements together. Draw connecting lines, add shadows under dimensional pieces, or paint over sections to create visual bridges between your materials. This step transforms separate pieces into a cohesive story.

💡 Pro Tips:

  • This step is optional but powerful—even simple pencil lines can unify chaos
6

Seal and protect the surface

Apply 2-3 thin coats of matte gel medium or acrylic varnish, drying between each layer. This protects your work and evens out the sheen across different materials—paper, fabric, and dimensional objects will now read as one unified surface.

Full gear guide
Phone Photography Kit: 9 Picks for Better Shots
See all picks →

Gear Up for Your Quest

Get everything you need to make this quest amazing.

Professional Gel Medium

Professional Gel Medium

EssentialPopular
$13.46

Bonds everything from paper to fabric without warping or bubbling, and creates archival-quality seal

Heavy-body matte gel medium for adhering and sealing mixed materials

Get on Amazon · $13.46

Brayer Roller

Brayer Roller

Essential
$6.69

Eliminates air bubbles and ensures even adhesion without tearing delicate papers

4-inch rubber brayer for smoothing adhered materials

Get on Amazon · $6.69

Mixed-Media Paper Pad

Mixed-Media Paper Pad

Essential
$6.99

Heavy enough to handle wet media without warping, textured surface grips materials

140lb heavyweight mixed-media paper in 9x12 inch pad

Get on Amazon · $6.99

Graphite Transfer Paper

Graphite Transfer Paper

Optional
$3.99

Lets you trace or add precise line work without drawing freehand on your finished piece

Graphite transfer sheets for adding drawn elements over collage

Get on Amazon · $3.99

RELATED GEAR GUIDE

Phone Photography Kit: 9 Picks for Better Shots

Field-tested picks · Creative Arts

As an Amazon Associate, IRL Sidequests earns from qualifying purchases at no extra cost to you.

Prices and availability are subject to change. The price shown at checkout on Amazon at the time of purchase will apply.