
Dip Your Own Candles From Scratch
Watch wax layers build with each dip—meditative, messy, and surprisingly addictive.
About This Quest
Learn the traditional craft of hand-dipping candles using beeswax or paraffin, creating tapered candles through repeated dipping.
Hand-dipping candles is one of those crafts that sounds old-fashioned until you try it—then you understand why people did this for centuries. There's a rhythm to it: dip, lift, wait for the wax to cool just enough, dip again. Each pass adds a thin layer that builds into a smooth, tapered candle. The wax feels slippery-warm on your fingers if you get careless, and the smell of melted beeswax fills the room with that honey-sweet scent that makes you want to keep going. You'll need a tall container for melted wax (a large tin can works perfectly), a heat source to maintain temperature, and cotton wicking. The key is keeping your wax between 150-165°F—too hot and it slides right off, too cool and it clumps. Your first few candles might come out lumpy or uneven, but by the fifth dip cycle, your hands find the timing. Beeswax gives you natural color and scent; paraffin is cheaper and takes color dyes well if you want bold hues. The waiting between dips is the hardest part—resist the urge to rush. Let each layer firm up for 30-60 seconds before the next plunge. After 20-30 dips, you'll have candles thick enough to trim and use. They burn slower than store-bought ones, and there's something satisfying about lighting something you built layer by layer with your own hands.
Why This Quest Matters
You'll hold a candle you built layer by layer, watching each dip add thickness in a rhythm that's genuinely meditative. These burn slower than anything store-bought, and lighting one means seeing 30 careful dips pay off in steady, even flame. By the fifth cycle, your hands will know the timing without thinking—that's when it clicks.
What You'll Experience
- The precise temperature ranges that make wax cooperate or rebel
- How to read cooling wax by sight—glossy to matte signals the next dip
- The patient rhythm of repetitive craft work that actually builds something tangible
- Why handmade candles burn slower and more evenly than commercial ones
What You'll Need
Top gear to make this quest great.
Pull it off
Digital Candy Thermometer with Clip
Wax temperature is everything—2 degrees too hot and layers won't stick, too cool and you get lumps. A clipped thermometer keeps both hands free for dipping while you monitor temp.
Get on Amazon · $14.99 — Digital Candy Thermometer with Clip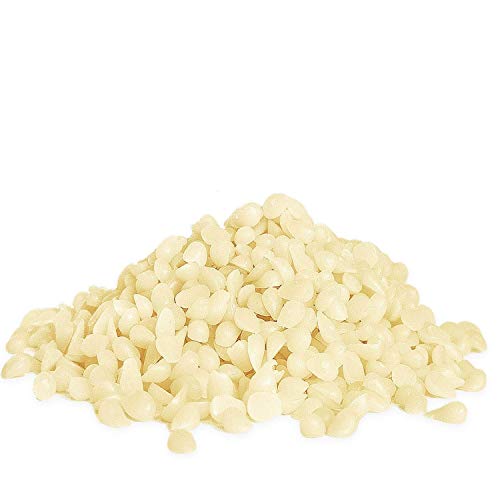
Pre-packaged craft wax comes in tiny amounts. Five pounds gives you enough for 15-20 tapered candles with room for practice runs and mistakes.
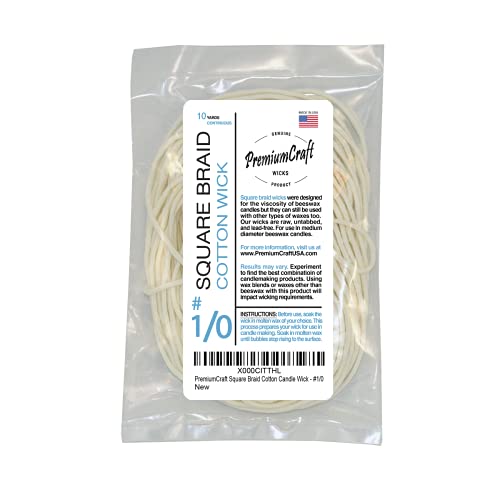
Regular string won't burn properly. Proper wicking ensures even burning and prevents smoking. Spool format lets you cut custom lengths.
As an Amazon Associate I earn from qualifying purchases. Prices may change.
Step-by-Step Guide
Prep your dipping station
Set your melting pot on a heat source in a well-ventilated space, newspapers underneath to catch wax drips. Melt your wax slowly to 160°F, filling the container at least 12 inches deep for full-length tapers. Keep a thermometer close—temperature control makes or breaks this whole process.
💡 Pro Tips:
- • A large tin can works perfectly as a tall, narrow dipping container
- • Beeswax gives natural honey scent; paraffin takes color dyes if you want bold hues
Prepare and prime your wick
Cut cotton wicking to your desired candle length plus 4 inches for handling. Dip it once quickly to coat, then straighten it while the wax is still warm. Let it cool completely for 2-3 minutes until it's stiff enough to dip cleanly.
💡 Pro Tips:
- • A straight, stiff wick is your foundation—don't rush this first cooling phase
Start your dipping rhythm
Plunge the wick straight down into the wax, hold for 1-2 seconds, then pull up with smooth, steady speed—no jerky movements. Hold the candle in the air for 30-60 seconds between dips, watching it shift from glossy to matte. That matte finish signals it's ready for the next plunge.
💡 Pro Tips:
- • Wax between 150-165°F is the sweet spot—too hot and it slides off, too cool and it clumps
- • Cooler room temperatures speed up the firming process between dips
Build thickness through repetition
Repeat the dipping cycle 20-30 times, checking that wax coats evenly on all sides. If one side thickens faster, rotate your hand position slightly on the next dip. The candle will grow about 1/8 inch thicker every 5-6 dips—patience pays off here.
💡 Pro Tips:
- • Resist the urge to rush; each layer needs those 30-60 seconds to firm properly
Finish and cure your candles
For the final 2-3 dips, lower your wax to 145°F for an ultra-smooth surface that seals without adding bulk. Trim the bottom flat with a warm knife while the wax is still slightly soft, then hang your candles to cure for at least 24 hours—beeswax improves with a full week.
💡 Pro Tips:
- • Small imperfections add character; large cracks mean your wax ran too cool during dipping
Gear Up for Your Quest
The gear that makes this quest work.
Pull it off

Digital Candy Thermometer with Clip
Wax temperature is everything—2 degrees too hot and layers won't stick, too cool and you get lumps. A clipped thermometer keeps both hands free for dipping while you monitor temp.
Get on Amazon · $14.99 — Digital Candy Thermometer with Clipdetails & deals →+ complete the kit — 4 more

Pre-packaged craft wax comes in tiny amounts. Five pounds gives you enough for 15-20 tapered candles with room for practice runs and mistakes.
Bulk candle-making wax for hand-dipping; beeswax offers natural honey scent and color, paraffin is neutral and takes dyes
Get on Amazon · $35.99 — Beeswax or Paraffin Wax (5 lbs)details & deals →
Regular string won't burn properly. Proper wicking ensures even burning and prevents smoking. Spool format lets you cut custom lengths.
Pre-tabbed or spool cotton wicking sized for taper candles (typically #2/0 or #1 gauge)
Get on Amazon · $13.99 — Square-Braided Cotton Candle Wick Spoolsdetails & deals →
Tall Stainless Steel Dipping Pot
RecommendedA tall, narrow container minimizes wax waste and gives you the depth needed for full-length tapers without using gallons of wax. Wide pots waste material.
Narrow, deep pot (12-14 inches tall, 4 inches wide) designed specifically for candle dipping
Get on Amazon · $24.99 — Tall Stainless Steel Dipping Potdetails & deals →
Candle Dye Blocks or Liquid Dyes
OptionalNatural beeswax is beautiful, but dyes let you create custom colors for gifts or seasonal candles. A little goes a long way—start with one drop per pound.
Concentrated colorants formulated for wax, comes in blocks or liquid droppers
Get on Amazon · $13.99 — Candle Dye Blocks or Liquid Dyesdetails & deals →RELATED GEAR GUIDE
Phone Photography Kit: 9 Picks for Better Shots
Field-tested picks · Creative Arts
As an Amazon Associate, IRL Sidequests earns from qualifying purchases at no extra cost to you.
Prices and availability are subject to change. The price shown at checkout on Amazon at the time of purchase will apply.
Editor's Picks
Hand-selected quests our team thinks you'll love

Dawn Patrol: Your First Bird Watching Adventure
Wake up with the birds and see your neighborhood through new eyes.

Creative Skills Quest Hub: Learn By Doing
The best way to learn creative skills? Make bad art until it gets good.

Hand-Built Ceramic Bowl Workshop
Your hands built the first bowls 20,000 years ago. They still can.