
Block Printing Your Neighborhood
Your city's sidewalks hold hundreds of printable patterns—you just need ink and paper to unlock them.
About This Quest
Learn to capture your city's hidden patterns through block printing—transform manhole covers, textured walls, and architectural details into wearable art and prints.
Block printing isn't just a studio craft—it's urban archaeology with ink. Every manhole cover in your neighborhood tells a manufacturing story through its raised lettering and geometric patterns. Brick walls reveal century-old kiln marks. Storm drains display foundry logos from companies that closed decades ago. With a brayer, some water-based ink, and decent paper, you're essentially creating forensic records of your city's industrial DNA. The technique is stupidly simple: roll ink onto a textured surface, press paper against it, peel away. What makes it addictive is the treasure hunt. That 1940s coal chute door you walk past daily? It's got embossed Art Deco typography. The sidewalk stamped with a contractor's name from 1987? That's your city's signature. You're not just making prints—you're collecting proof that someone made something permanent here, and you're the first person in years to actually notice. Start with manhole covers because they're everywhere and forgiving. The metal's texture does half the work. Avoid fresh asphalt (tar bleeds through) and painted surfaces (chemicals mess with ink). Bring baby wipes for cleanup and a folder to keep prints flat. The best finds happen when you stop treating your commute like transportation and start reading it like Braille.
Why This Quest Matters
You'll stop walking your city on autopilot and start reading it like archaeology. Every print is proof that someone made something permanent here decades ago, and you're the first person in years to actually notice. You're not just making art—you're collecting your city's industrial signature, one inked impression at a time.
What You'll Experience
- How to read urban surfaces as printable textures instead of infrastructure
- Water-based block printing technique with brayer and baren
- Your neighborhood's industrial history through foundry marks and contractor stamps
- How to notice the permanent signatures people left in concrete and metal decades ago
- Which surfaces hold the best prints and how pressure affects transfer quality
What You'll Need
Top gear to make this quest great.
Pull it off
Speedball Soft Rubber Brayer (4-inch)
Essential for both rolling out ink and applying pressure to transfer prints from textured surfaces to paper—the soft rubber conforms to uneven urban textures better than hard plastic
Get on Amazon · $6.98 — Speedball Soft Rubber Brayer (4-inch)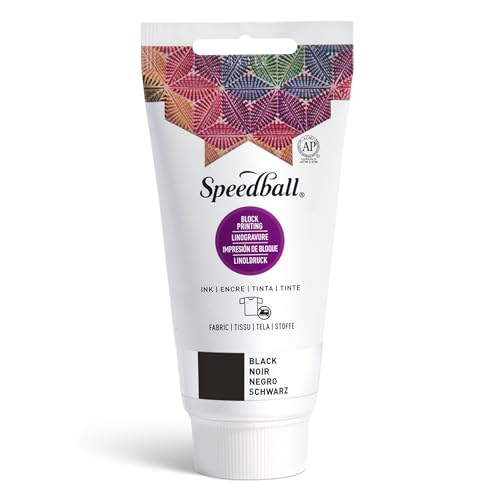
Specifically formulated for relief printing—thick enough to sit on raised surfaces without running into crevices, washes off urban surfaces easily with water
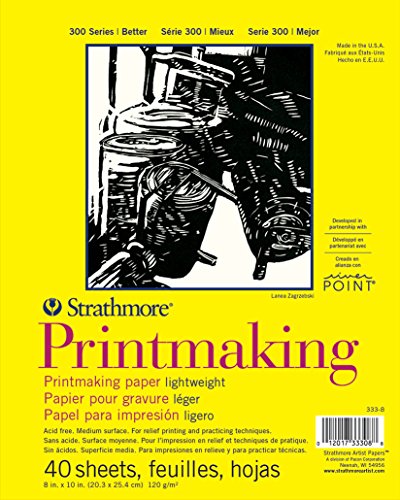
Regular copy paper tears under pressure and doesn't pull ink cleanly—printmaking paper has the tooth and weight to capture fine details from rough surfaces
As an Amazon Associate I earn from qualifying purchases. Prices may change.
Safety Tips
- The Speedball ink is non-toxic and water-miscible, making cleanup easier, but still avoid contact with eyes and wash hands thoroughly after use.
- Since this ink produces permanent results on fabric and paper without heat setting, be careful not to get it on clothing you want to keep clean—it will be difficult to remove once dry.
Step-by-Step Guide
Scout and photograph textured surfaces
Walk a 10-block radius hunting for bold manhole lettering, cast-iron grates, stamped concrete, and brick walls with deep mortar lines. Take photos to remember each location—you'll return with supplies.
💡 Pro Tips:
- • Avoid fresh asphalt (tar bleeds through) and painted surfaces (chemicals interfere with ink)
- • Look for 1940s coal chute doors with Art Deco typography and sidewalk contractor stamps
Clean and ink your first surface
Wipe dirt and grit off the surface with a damp rag, let dry 2 minutes. Squeeze a 2-inch ribbon of Speedball water-miscible ink onto your palette, roll the 4-inch brayer through it until the sound shifts from sticky to smooth, then roll overlapping passes directly onto the textured surface.
💡 Pro Tips:
- • Work quickly before the ink dries—urban surfaces are less forgiving than studio blocks
Press and peel your print
Position your 8x10 inch printmaking paper over the inked surface, holding corners to prevent shifting. Use the baren to press firmly across the entire sheet for 30 seconds, then peel slowly from one corner and watch the image emerge.
💡 Pro Tips:
- • Note any blank spots—they'll tell you where to increase pressure on your next attempt
Collect prints from remaining locations
Move to your next surface while the first print air-dries. Repeat the ink-and-press process, adjusting ink quantity and pressure based on what transferred well or poorly on earlier attempts. Aim for 5-8 total prints.
Clean surfaces and research your finds
Wipe all inked surfaces clean with baby wipes—the water-miscible ink lifts easily. At home, let prints dry overnight, then photograph them and research the captured text: foundry names, dates, contractor stamps. Document what you found and where.
💡 Pro Tips:
- • Many foundries and contractors are long gone—you're creating forensic records of vanished companies
Gear Up for Your Quest
The gear that makes this quest work.
Pull it off

Speedball Soft Rubber Brayer (4-inch)
Essential for both rolling out ink and applying pressure to transfer prints from textured surfaces to paper—the soft rubber conforms to uneven urban textures better than hard plastic
Get on Amazon · $6.98 — Speedball Soft Rubber Brayer (4-inch)details & deals →+ complete the kit — 3 more

Specifically formulated for relief printing—thick enough to sit on raised surfaces without running into crevices, washes off urban surfaces easily with water
Water-soluble relief printing ink in black or primary colors
Get on Amazon · $10.49 — Speedball Water-Based Block Printing Inkdetails & deals →
Regular copy paper tears under pressure and doesn't pull ink cleanly—printmaking paper has the tooth and weight to capture fine details from rough surfaces
Heavyweight printmaking paper designed to absorb ink without tearing
Get on Amazon · $9.46 — Strathmore 400 Series Printmaking Paperdetails & deals →
Japanese Baren (or wooden spoon)
RecommendedGives you precise control over pressure distribution—lets you work texture variations in real-time and reach into corners the brayer can't hit
Flat disk tool used to burnish paper onto inked surfaces by hand
Get on Amazon · $7.99 — Japanese Baren (or wooden spoon)details & deals →RELATED GEAR GUIDE
Phone Photography Kit: 9 Picks for Better Shots
Field-tested picks · Creative Arts
As an Amazon Associate, IRL Sidequests earns from qualifying purchases at no extra cost to you.
Prices and availability are subject to change. The price shown at checkout on Amazon at the time of purchase will apply.
Editor's Picks
Hand-selected quests our team thinks you'll love

Dawn Patrol: Your First Bird Watching Adventure
Wake up with the birds and see your neighborhood through new eyes.

Creative Skills Quest Hub: Learn By Doing
The best way to learn creative skills? Make bad art until it gets good.

Hand-Built Ceramic Bowl Workshop
Your hands built the first bowls 20,000 years ago. They still can.