Carve one neighborhood texture into a 4×6 inch block, print 10 to 15 copies, sign and number them in pencil, and give the best one to the friend who spotted the shape.
Bonus challenge: Print one copy on a page of newspaper or an old envelope and see which background everyone likes better.
Accept this questSaves it to your list, no account needed.
Time
2-3 hours
Cost
Free with your own gear
Starter gear from $18
A beginner linoleum kit with block, cutters, ink and roller runs about $18. Extra blocks and paper cost a few dollars per session, and scrap paper is free.
solo, date night, friends, family · Ages 12+ for carving; younger kids can shoot photos, design and print while an adult does the cutting
Level
Beginner
Where
Both
Season
Year-round
About This Quest
Grab a friend and spend half an hour photographing the strange little details within six blocks of home: a rusted grate, a cracked tile, a stamped manhole cover. Then pick the best one, carve it into a linoleum block, and hand-print a dozen copies to sign and hand out.
A sidewalk you walk every week is full of shapes nobody looks at twice. Today one of them becomes a print you can frame, and the two of you get to argue about which shape deserves it.
You'll photograph 15 to 20 details, pick one winner, trace it onto a 4×6 inch linoleum block, and carve it with the little gouges from a beginner kit. Carving is slower than it looks, and wobbly lines look great, so there's no wrong way to do this. By the end you'll be peeling back paper on your own signed edition.
Why This Quest Matters
Buying art is easy. Making art out of a drain cover you've stepped on a hundred times is something else. There's a real jolt when you peel the paper off the block for the first time and your own carved lines appear in ink. The shape was always there. You're the one who finally gave it a frame.
What You'll Experience
Hunt for shapes: Comb six blocks for grates, bricks and bolts worth printing, and vote on a favorite.
Carve your own block: Watch your traced lines turn into ridges and grooves you can feel with a thumb.
Peel the big reveal: Lift the paper off the inked block and see your print appear all at once.
Sign an edition: Number 10 to 15 prints in pencil and hand them out like a proper artist.
What You'll Need
Top gear to make this quest great.
Pull it off
Speedball Linoleum Block Printing Kit
Gives you the 4×6 inch block, the carving cutters, ink and roller in one beginner-friendly box.
As an Amazon Associate I earn from qualifying purchases. Prices may change.
Before You Begin
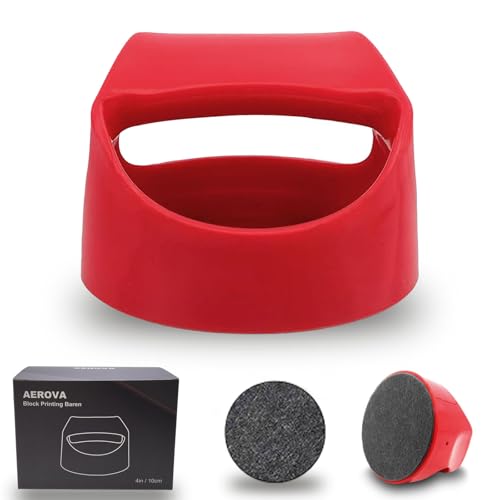
Clear the kitchen table, put on something you don't mind inking, and bring someone with opinions about manhole covers. Essentials: a beginner linoleum block printing kit (it has the 4×6 inch block, the V-shaped and U-shaped cutters, water-based ink and a roller), paper to print on, a pencil, and a cutting mat or thick cardboard under the block. Handy extras: graphite transfer paper so your traced lines land cleanly, and a round burnishing disc that presses more evenly than a spoon. Photograph from public sidewalks only, and ask before you shoot someone's doorway or yard.
Safety Tips
A good quest stays a good story. These are general notes; your gear's manual, the venue's rules and local law come first.
Always push the cutter away from your body, and keep your free hand behind the blade, never in front of it.
Brace or clamp the block against something solid so it can't slide while you carve, and work on a stable, well-lit surface.
Stop carving the moment your hands get tired. Most slips happen in the last five minutes of a session.
Follow the kit's instructions for changing blades, keep spare blades in their packaging out of reach of children, and have adhesive bandages on the table.
Children under 12 should stick to spotting shapes, drawing and printing; an adult handles the cutters.
Shoot your photos standing on public ground and out of traffic lanes. No climbing fire escapes, fences, docks or scaffolding for a better angle.
Step-by-Step Guide
1
Go Shape Hunting
35 min
Walk a six-block loop around home with your phone out and photograph 15 to 20 details: a stamped manhole cover, a rusted grate, chipped tile, a bolt pattern, peeling paint on a door frame. Call out finds to each other as you go. Stay on the sidewalk, and ask first if a doorway or yard is private.
💡 Pro Tips:
• Bold shapes with clear edges carve best. Soft shadows and fading tones vanish the second you start cutting.
2
Pick The Winner
15 min
Back at the table, scroll through your photos together and shortlist three. Crank the contrast on each one in your phone's editor until it's almost pure black and white, then vote. The one that still reads clearly as flat shapes is your design. Mark the shape you'll carve away: everything you cut becomes blank paper.
💡 Pro Tips:
• If your shape has letters or an arrow, flip the image before tracing. The print comes out as a mirror image of the block.
3
Trace It Onto Lino
10 min
Lay graphite transfer paper on the 4×6 inch linoleum block, gray side down, put your sketch or printout on top, and trace the outlines with a pencil. Lift it off and you'll have clean gray lines ready to carve. No transfer paper? Draw straight onto the block with a soft pencil. Same job, slightly looser lines.
💡 Pro Tips:
• One sheet of transfer paper holds up for eight to ten designs, so don't throw it out after the first use.
4
Carve The Block
60 min
Put the block on a cutting mat, brace it, and start with the small V-shaped cutter to outline your lines. Then swap to the wider U-shaped cutter to scoop out the big areas you want blank. Push away from your body, take it in short bursts, and trade turns if you're working as a pair. Cuts are permanent, so go slow.
💡 Pro Tips:
• Carve less than you think at first. You can always remove more lino, but you can never put it back.
5
The First Reveal
15 min
Here's the moment. Squeeze a little water-based ink onto a scrap surface, roll it thin with the roller, then roll it evenly over the carved block. Lay a sheet of paper on top and rub firmly with the burnishing disc or the back of a spoon for 20 to 30 seconds. Peel one corner slowly and watch your print appear. Fix any spots that need a little more carving.
💡 Pro Tips:
• Too much ink fills your fine grooves and turns them to mush. A thin, slightly tacky layer always prints sharper.
6
Print And Sign Your Edition
30 min
Now repeat it: re-ink, print, peel, and lay each sheet out to dry until you have 10 to 15 copies. They won't be identical, and that's the charm of hand printing. Once dry, sign each one in pencil in the bottom margin and number them (1/12, 2/12). Hand the best copy to whoever spotted the shape.
💡 Pro Tips:
• Rinse the block and roller with water before the ink dries, and your block will print again next weekend.
You turned a shape you'd walked past a hundred times into a signed, numbered print. Photograph your favorite copy next to the real thing and show the friend who voted for it.
Carve it once, print it forever, give the best one away.
Grab a friend and spend an afternoon carving a design into a soft linoleum block, then rolling on ink and pulling print after print of the same bold image. Your first pull is the big moment: peel the paper back and your drawing is suddenly there in crisp black.
Carve once, print forever—turn blank fabric into wearable art with hand-cut stamps.
Carve your own stamps and print repeating patterns on fabric. Turn blank tote bags and tea towels into custom pieces using traditional block printing techniques.